Virtkick Docs
Documentation and information to Virtkick your business
Virtkick is designed to be the only software you need to start your new hosting business or upgrade an existing one. This article will walk you through the steps you will need to get your Virtkick panel set up for the first time.
1. Add a hypervisor
First, you will need to connect a hypervisor to your panel. A hypervisor is a dedicated server or a high quality virtualized server that has that has at least 16 GB of RAM, Centos 7 with a stock kernel and virtualization enabled in the bios. If you have a machine that meets these requirements you are all set to add your first hypervisor.
Click the Admin tab to switch to the administrative view on your panel, from there click Hypervisors on the left navigation bar, then click "Connect New Hypervisor". You should be on a screen similar to the one below.

On this screen you will want to enter your IP address or FQDN (server1.yourbusiness.com) in the "Hostname" field and the root password for your server.
The root password is not saved, we use this to set up the hypervisor and insert our public key only, all subsequent connections will use key base authentication. If you do not have a root password enabled on your machine, please temporarily enable it, once set up is complete you can safely restrict root login to key based authentication only.
Once you have completed the form, click "Connect". The following set up process may take a few minutes so be sure to be patient. Once the process is complete you will find yourself back on the hypervisor tab and your new hypervisor should be listed there.
2. Add an IP Pool
Now that you have a hypervisor configured, you will need to add an IP pool so virtual machines created on that hypervisor can communicate with the greater internet. Reach out to your server provider and obtain the following information before getting started:
- The IP range (usually expressed as 1.1.1.1/24)
- The gateway for your IP range
Once you have this information, click the IP Pools tab on the left navigation and click the "+" button to open the "Add New IP Pool" screen, you should see something like this:
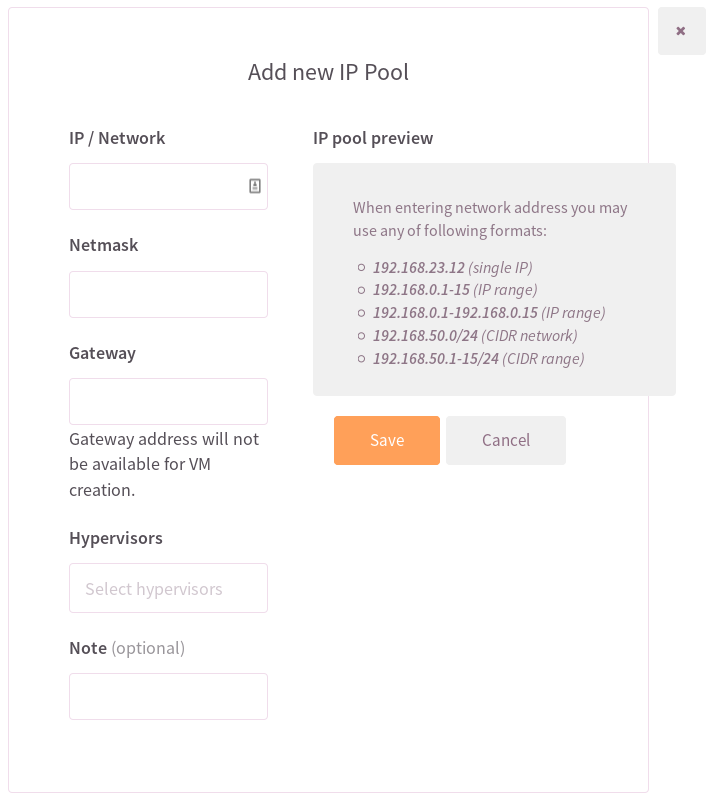
Do you have an OVH hypervisor? Take a look at our OVH networking guide.
Enter your IP range (with the CIDR subnet mask, the /24) into the "IP/Network" box, you should see the "Netmask" box disappear when you do this.
Enter your gateway address in the "Gateway" box.
Lastly, select the hypervisor you added before in the "Hypervisors" box.
Once the form is complete click save and your IP pool will be added to your panel.
3. Customize your panel (Optional)
Next, you may want to take some time to customize your panel. You can do this by clicking the "Appearance" tab on the left in the administration view. Once you click that, you should see a page similar to this:
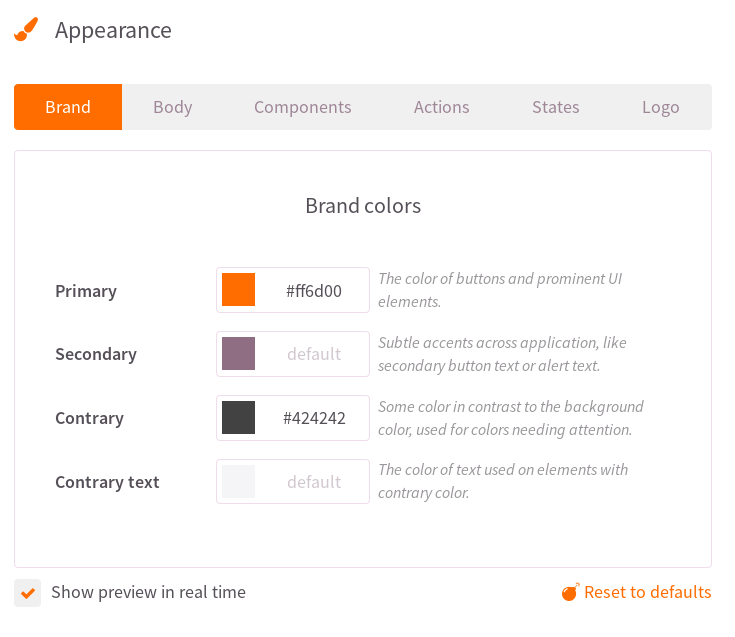
We recommend you click the "Show preview in real time" checkbox if it is not already checked. This will allow you to change colors and see how they look in real time. Also be sure to upload your logo by clicking the "Logo" tab.
If everything looks good, click the "Publish" button and the new style will show for all users of your panel. If you ever want to reset to defaults, you can click the "Reset to defaults" button, or click "Revert changes".
4. Add some plans
Now that your panel is customized, your IP pool is added and your hypervisor is up and running you will just need to add some plans! Click the "Plans" tab on the left in the administration view, you should then see the plans page. Click the "+" button to add a new plan, you should see something similar to this:
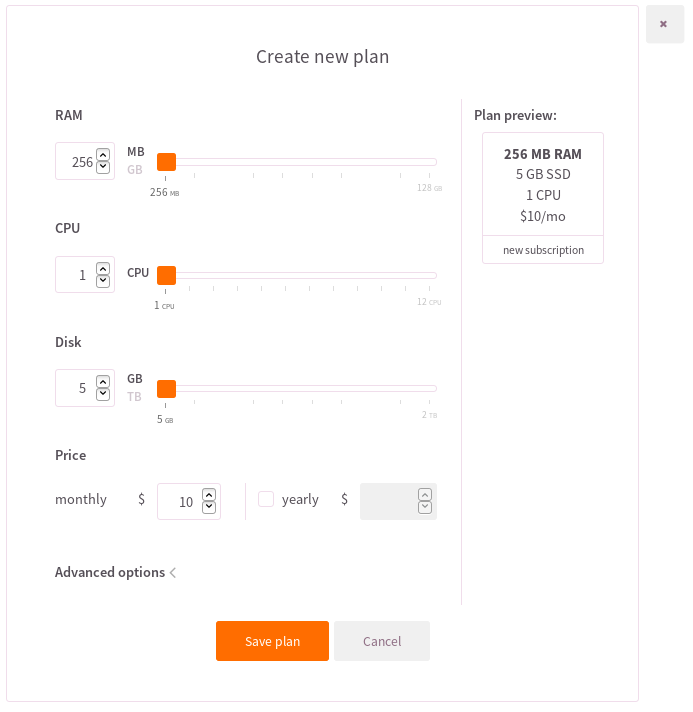
Now you'll want to create your plans - you can either drag the sliders or enter values into the text boxes to the right when selecting plan parameters. Be sure to select a price and check the "yearly" box if you want to offer annual plans. When you are done, click "Save Plan".
We generally recommend adding 5 or more plans in total. Try to some cheaper plans, some mid-range plans, and some more expensive plans so customers can try your services at a lower cost and eventually upgrade to a larger plan.
If you are satisfied with your plans, it is time to get to the fun part - creating your first virtual machine!
5. Create a Virtual Machine
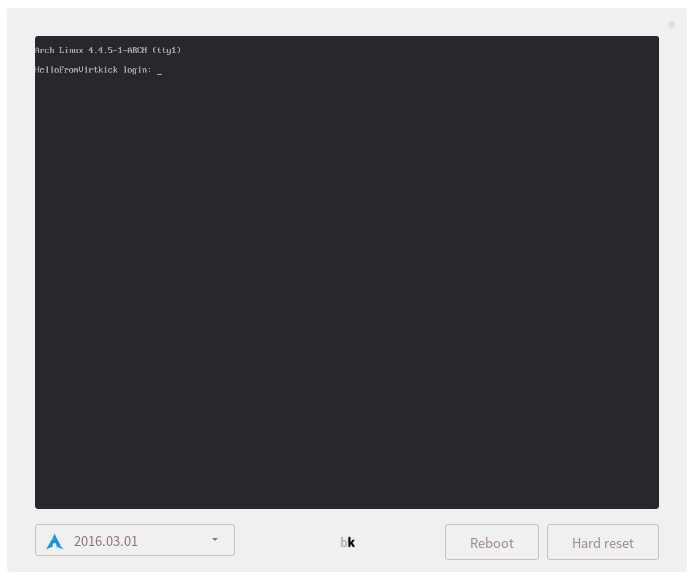
To create your first virtual machine click the "Create new machine" button displayed on every page. You will be brought to the "Create new machine" page. From here, select the distribution you would like (you can click the dropdown to select other versions), name your machine, select your plan and click "Create Machine". Give the a few seconds to create, when it is done you will be brought to the console of your new virtual machine. Be sure to test that your machine has connectivity to the internet and that you can start and stop it. If all looks good, your panel is now set up!
The only step remaining is to switch your panel to live mode.
6. Go live
The last step is easy, just click the "Settings" option on the left from the administrative panel. When you do that you will see a page similar to this:
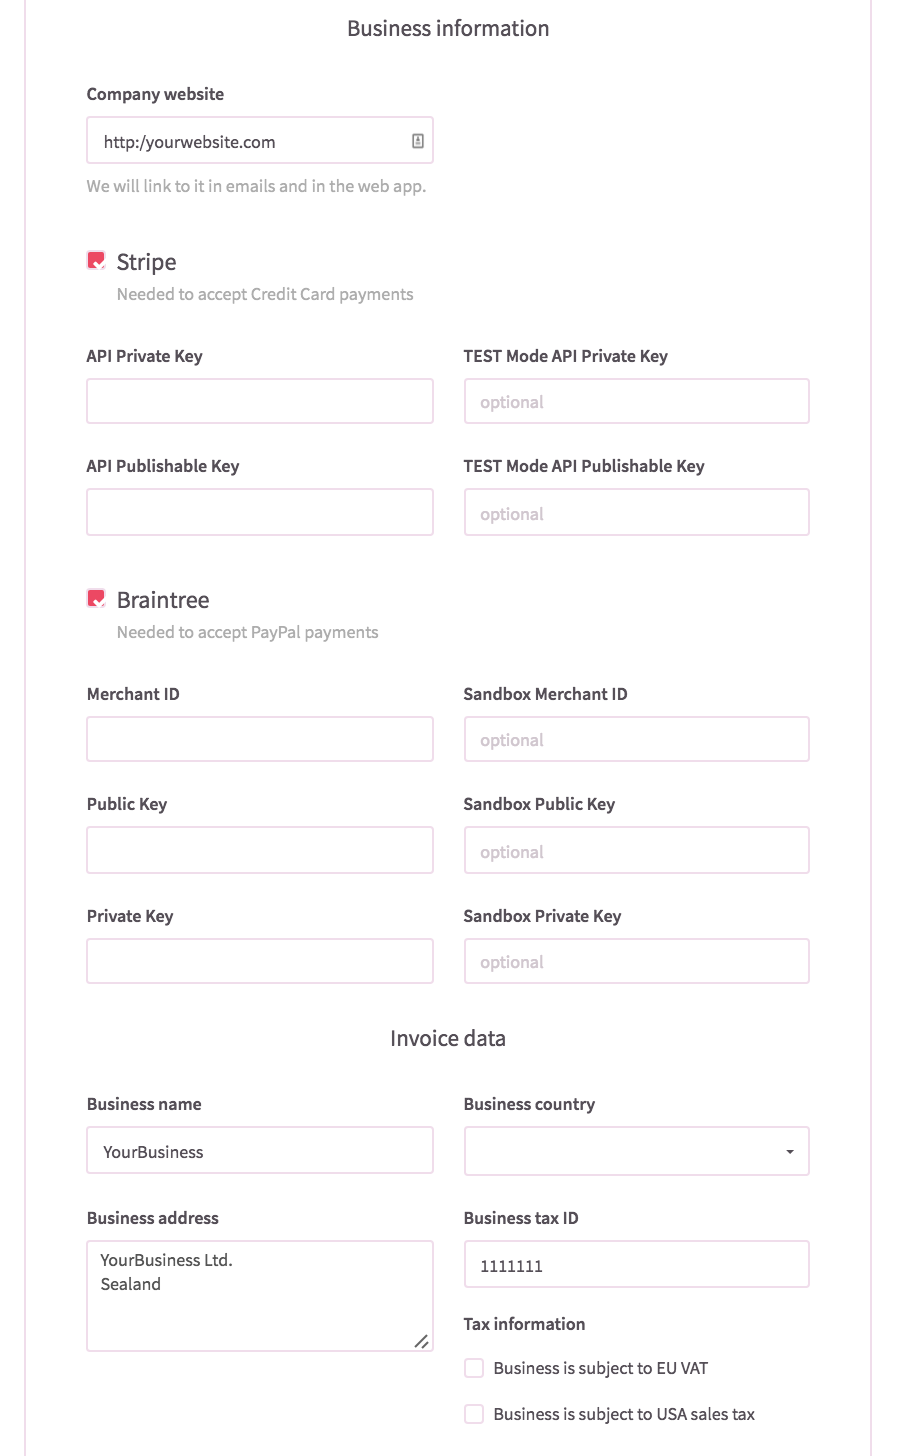
This is the place to provide your own payment gateway data: Stripe for credit cards and Braintree for PayPal. You also need to provide you invoice information here and voila! Now you only have to click the Save button at the very bottom and you can switch your panel to live mode.
After your panel is in live mode all machines created will actually bill the credit cards added to the account creating the machine. You are now ready to start selling!
Have any problems? Please let us know, we are always happy to help!
comments powered by Disqus