Virtkick Docs
Documentation and information to Virtkick your business
OVH uses a slightly different approach to networking that requires some special steps in the Virtkick panel when you add an IP range for an OVH hypervisor. This article will walk you through the process of adding an OVH IP range to your Virtkick panel.
1. Collect information about your IP range
First you will want to log in to your OVH control panel. Once you have logged in, click the IP tab on the left.
You should now see a list of IP ranges you have purchased. Collect the following information:
- The starting IP of the range (the first IP)
- The netmask in CIDR notation (this will be shown after your IP address, for example 192.168.1.0/24, /24 is your netmask)
Once you have that information click the dedicated servers tab on the left and select the dedicated server this range is assigned to. Note the IP address of your dedicated server.
After you have this information you can move on to step two.
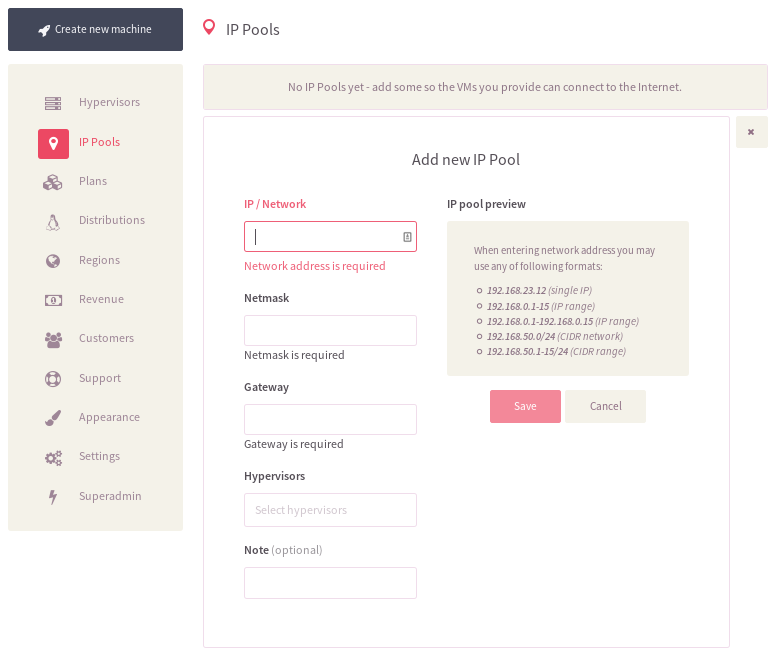
2. Go to the IP pools manager on your Virtkick panel
With all the information you need to configure the IP pool head over to the IP pools manager on your Virtkick panel.
In the IP/Network field enter the the starting IP / the CIDR netmask. For example, if your first IP address is 1.1.1.1 and your CIDR netmask is /24 you would enter:
1.1.1.1/24
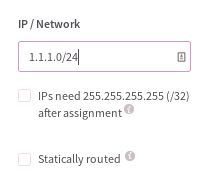
After you do this, you should see a new checkbox appear under this field saying "IPs need 255.255.255.255 (/32) afer assignment", be sure to check this checkbox.
In the gateway field you will need to enter the IP address of your dedicated server with the last octect replaced with 254. For example, if your dedicated server IP address is 143.23.215.25 you would need to enter the following:
143.23.215.254
Lastly select the hypervisor this range should be assigned to and click save.
3. Create virtual MAC addresses for your IP range
Next, you will need to head back over to your OVH control panel. Go back to the IP tab and expand your IP range. From here you will need to click "Generate a Virtual Mac" for each IP address in the range. You will be asked what kind of virtual MAC this is to be, select ovh and enter anything you like for the name it will not be used of seen again.
After you have done this for all IP addresses move on to the next step.
4. Submit IP to MAC address mapping
Now that you have created the IP pool and virtual MAC addresses for each address you will need to submit a mapping of IP addresses to MAC addresses. You can do this by visiting https://yourpanel.myvirtkick.com/admin/ipmac - be sure to use your custom domain instead of yourpanel.myvirtkick.com if you have one.
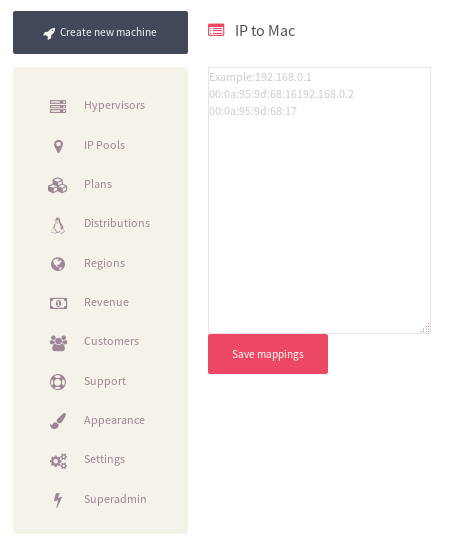
You will need to enter each IP address followed by a space and then the virtual MAC address OVH gave you for that IP address. For example:
192.168.1.1 aa:aa:aa:aa:aa:aa
192.168.1.2 bb:bb:bb:bb:bb:bb
...
Be sure to put a space between your IP address and your MAC address.
After this has been done for each IP address in your range, click save and you are all set to create your first machine on your OVH hypervisor!
Have any questions or problems? Let us know! We are happy to help.
comments powered by Disqus