Virtkick Docs
Documentation and information to Virtkick your business
Virtkick fully supports OVH default kernel (xxxx-grs-ipv6-64) as of July, 2016. This article is no longer relevant.
One of the most important requirements for a hypervisor to be used with Virtkick is the kernel. Virtkick was designed to utilize the stock CentOS 7 kernel, however some providers use a custom kernel on their offerings by default, one such provider is OVH. This guide will walk you through setting up your OVH dedicated server with a stock Centos kernel using the OVH manager.
1. Login to the OVH Manager
First you will need to log in to your OVH manager. Once you are there, open the "Dedicated Server" tab on the left.
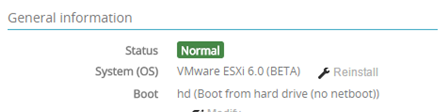
From there, look for "System (OS)" with the currently installed operating system next to it. You should find a wrench icon that says "Reinstall", click that.
2. Reinstall Using Stock Kernel
Next, you should see a screen similar to the one below:

Select the "Install from an OVH template" option as shown above. Next, you will see a screen similar to this:

Select the CentOS 7.2 distribution from the list under LINUX, then click next. You will then see the following screen:

Check the "Install original kernel" box - this step is very important, you will end up with the default OVH kernel if this box is not checked. Once you have checked the box, click "Confirm".
3. Connect the Hypervisor to Virtkick
The reinstall process will take a few minutes (typically 5-10 minutes), you will be able to track the status on the OVH manager. Once the process is complete, you are all set to add the hypervisor to your Virtkick panel!
Virtkick fully supports OVH default kernel (xxxx-grs-ipv6-64) as of July, 2016. This article is no longer relevant.
