Virtkick Docs
Documentation and information to Virtkick your business
Virtkick currently offers two types of billing, provider billing and Virtkick billing.
- Virtkick Billing is offered in countries where Stripe and Braintree are unavailable
- Provider Billing is offered in countries where both Stripe and Braintree are available
If you are in a country where Stripe and Braintree are available you can take advantage of provider billing. With provider billing all payments will go through your own Stripe and Braintree accounts. This guide will walk you through the process of getting your Virtkick panel configured to support provider billing.
Configure Stripe
Virtkick uses Stripe to accept major credit cards. You will need to provide Stripe API keys to enable your panel to accept credit card payments. Follow the steps below to configure your panel for Stripe access.
1. Create Stripe Account
First, you will need to create a Stripe account for your business. You can do that by visiting this page. You will need to provide your email and a password to get started.
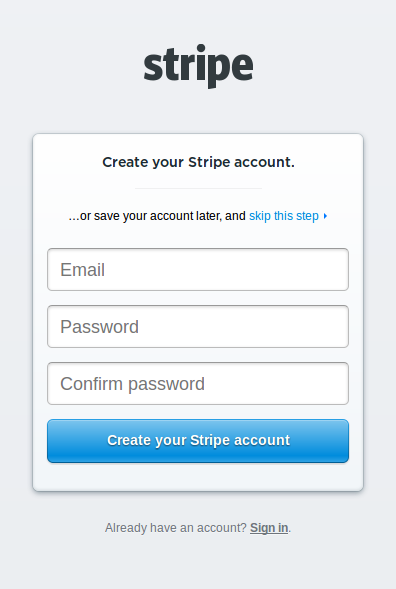
Once you have created your account and signed in you can move on to step 2.
2. Configure Stripe API Keys
After you have created your account and signed in you should see the Stripe dashboard.
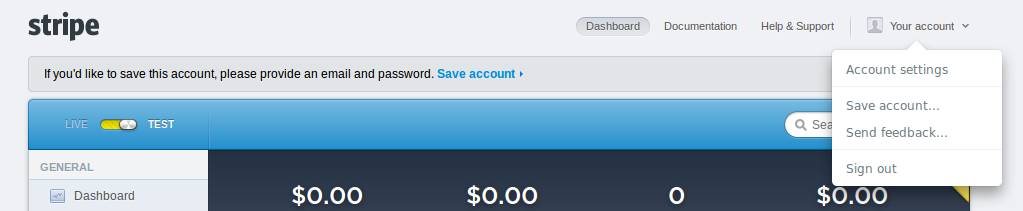
Click the account drop down (hilighted above) then select "Account Settings". You should then see a screen similar to the one below.
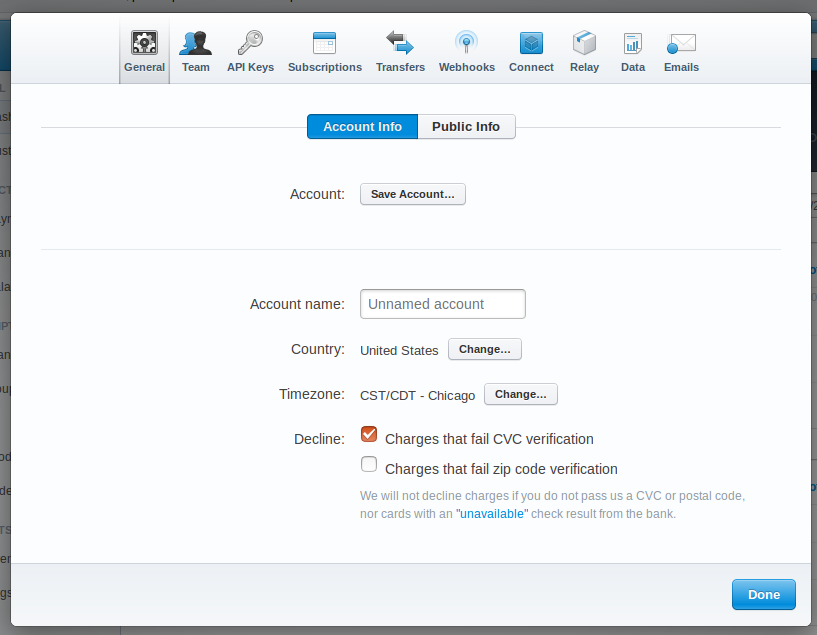
Click "API Keys" in the Stripe dashboard to view your API keys.
In a separate tab open your Virtkick panel. Select the "Admin" tab at the top right of the screen. From there, select the "Settings" option on the left.
Scroll down a bit until you come to a screen that looks like the one below:
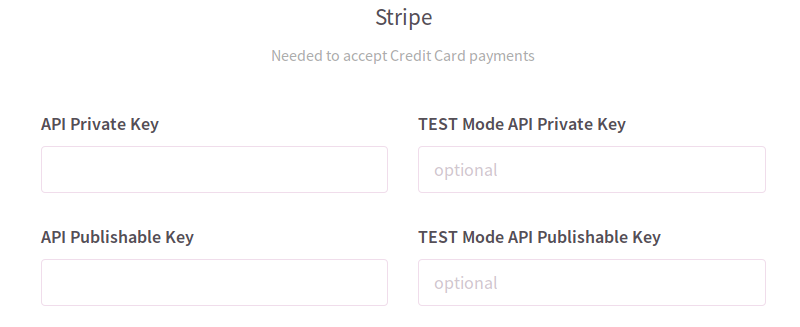
With both tabs open, match up the data from the "API Keys" section of the Stripe dashboard with the Virtkick panel settings page as shown below:

Click save and your keys will be saved. Your panel is now configured to accept credit card payments through Stripe.
Configure Braintree and PayPal
Virtkick uses Braintree as a provider for PayPal payments. Without Braintree configured your panel will not be able to accept PayPal payments. Follow the steps below to configure your panel for Braintree access.
1. Create Braintree Account
First you'll need to get yourself a Braintree account. If you already have one, feel free to skip this step.
You can create an account using this link if you are within the United States. If you are not, visit Braintree's website and select your country before clicking sign up.
Complete the information requested on the sign up page to create your account. Once you have an account, proceed to step 2.
2. Configure Braintree Account
Next, you will need to continue your Braintree account to accept PayPal payments. Braintree provides great documentation that will walk you through this process, please reference Braintree's PayPal Documentation for specific steps required.
After you have configured your Braintree account to use PayPal you can move on to step 3.
3. Configure Braintree API Keys
With your Braintree account configured to allow PayPal payments you will now need to gather the information needed to configure your Virtkick panel to use Braintree. First, go to the Braintree dashboard - you can do this by clicking the Braintree icon in the top right corner if you are already elsewhere in the dashboard, or by clicking login on the Braintree website.
When you get to your dashboard you should see something similar to the image below.
Look for the section called "Production API Keys" as shown above.
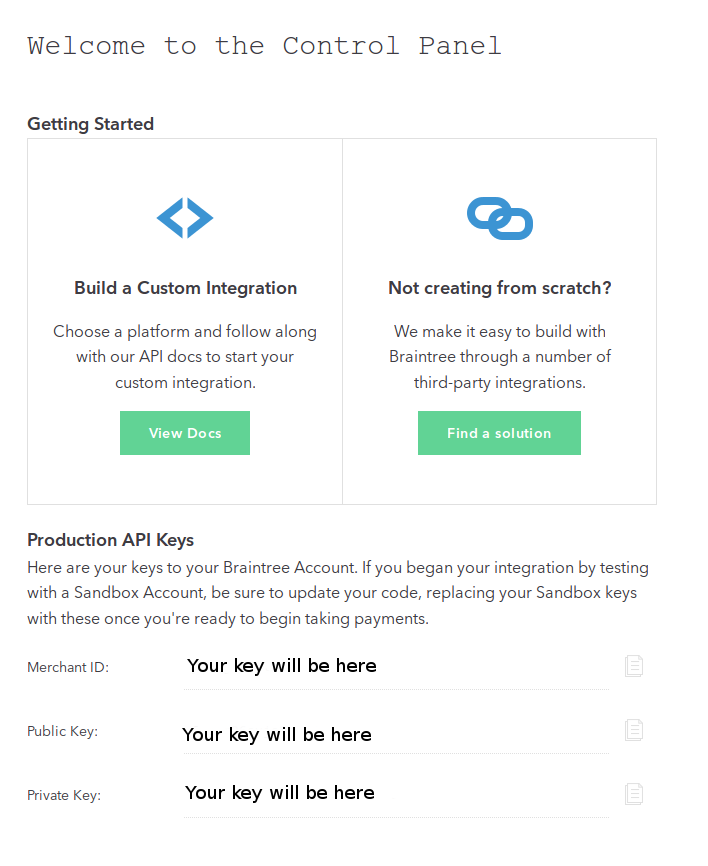
Next, open a separate tab and head to your Virtkick panel. Click the "Admin" tab to enter the administration panel, then click "Settings" on the left. Once there, scroll down a bit until you see a page similar to the image below.
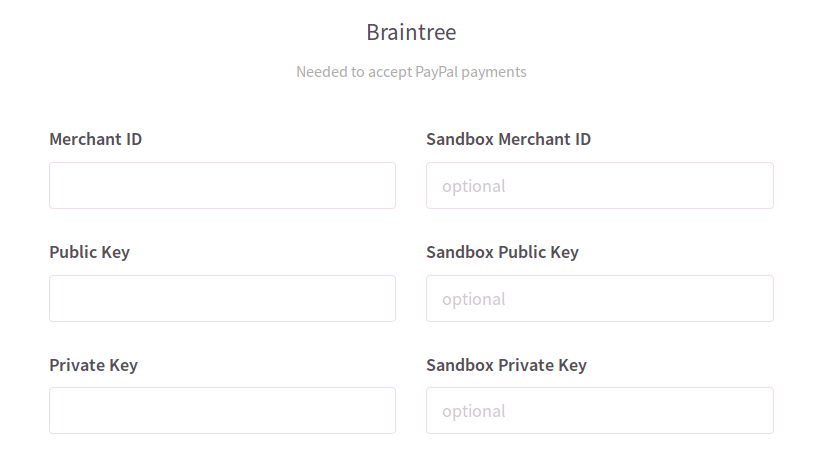
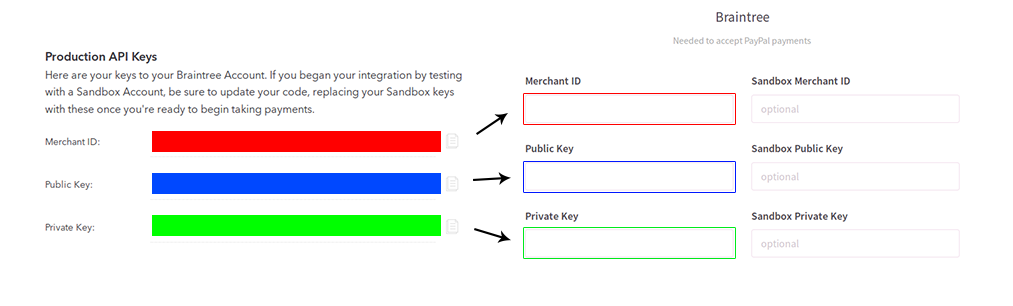
Once you have located the Braintree section, match up the information from the Braintree dashboard with the Virtkick settings page as shown below:
The "Sandbox" credentials are completely optional - if you provide them you will be able to test PayPal payments while in "Test" mode. Without them you will only be able to process live PayPal transactions. You can sign up for a Braintree sandbox account if you wish to enable PayPal test payments.
After all the information has been entered, click save. Your panel will now be configured to accept PayPal payments.
Configure Invoice Settings
The last step you will need to take in this process is configuring the details to appear on your invoices. You can do this from the "Settings" page in the "Admin" tab on your Virtkick panel. Scroll down until you see a section similar to the screen shot below.
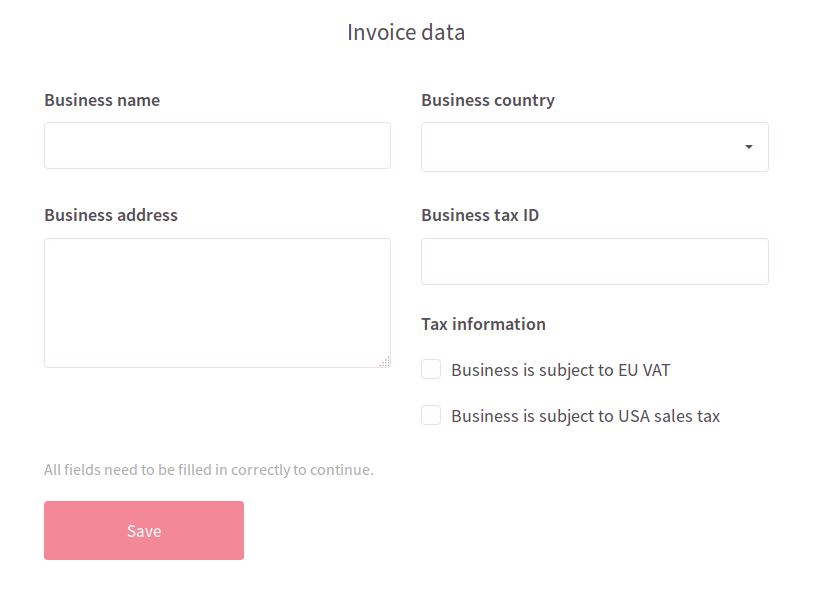
Complete the form shown and click "Save" after all fields have been filled out. Congrats! Your panel should now be configured to accept both credit card payments through Stripe and PayPal payments through Braintree.
Enable Live Payments
When you have completely configured your panel (include plans, hypervisors, customization, etc) you can enable "Live" mode. Enabling "Live" mode will enable you to start billing your customers for real - all transactions processed in "Live" mode will actually charge the payment method supplied.
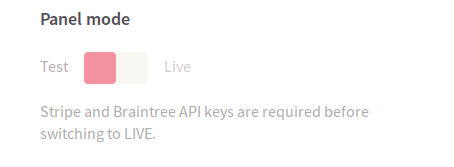
If you are ready, flip the "Live" switch on the "Settings" page (shown above).
Have any problems? Let us know - we are happy to help!
comments powered by Disqus